Lesson 5 · 9 min
Composition: What to Put Where
The rule of thirds, breathing room, and how to decide what stays in the frame and what gets cut out.
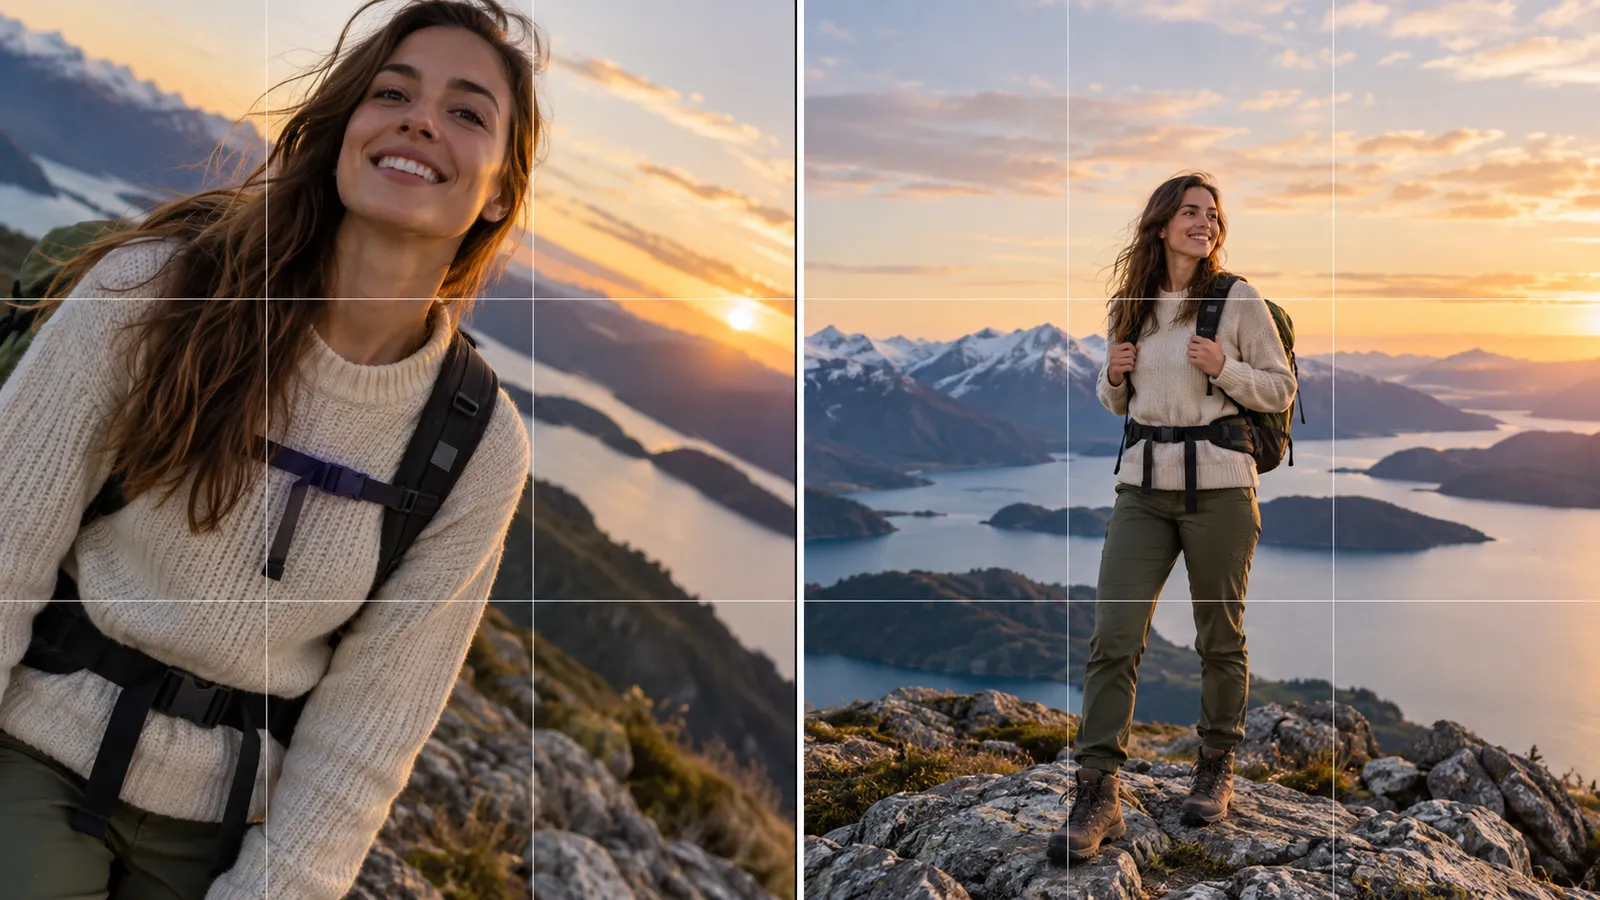
In this lesson: how to arrange your client, the space around them and the background inside the frame. Why it matters on an HNC shoot: two photos of the same person in the same light can feel completely different: one looks planned and professional, the other looks like a snapshot. The difference is almost always composition, and it takes seconds to get right.
The rule of thirds
Imagine the picture divided into nine equal boxes by two vertical lines and two horizontal lines, like a tic-tac-toe board. Where the lines cross are four strong spots. The rule of thirds says that a subject placed on a line, or at one of those crossings, looks more natural and more interesting than one placed in the dead center.
Turn on the grid in your camera settings. Every phone has one. It puts those lines on your screen as you shoot.
For a portrait, use the grid like this:
- Put the eyes on the top line. The eyes are the most important part of a face. When they sit near the top third, the face looks balanced.
- Put your client on a vertical line, not in the middle, so there is space beside them.
- Leave space in the direction they face. If your client looks to the right, leave more empty room on the right. This is called "looking room" or "nose room", and it makes the picture feel open instead of cramped. A person looking out of the frame, or with their nose touching the edge, feels trapped.
Centered is not always wrong. A symmetrical scene, such as a doorway, a long road or a person looking straight into the lens, can look strong in the middle. The rule of thirds is a good default, and a good photographer knows when to break it on purpose.
Breathing room (headroom)
Leave a little space above the head, enough that it does not touch the top edge, but not so much that the person looks like they are sinking. As a guide, a gap of about one-eighth to one-sixth of the picture's height looks natural. The same applies at the sides: do not let hands, elbows or shoulders touch the very edge.
Do not crop at the joints. Cutting a person off at the ankles, knees, wrists or elbows looks awkward. Crop between joints, for example at the middle of the thigh or the middle of the forearm.
Eye level and the angle of the shot
Camera height changes how a person feels in the photo. The next lesson covers angles in detail. For now, keep the camera at your client's eye level or slightly above it, so you are not looking up their nose or down at the top of their head.
What to cut out of the frame
Before you press the button, take a five-second scan of the edges of your picture. This is the habit that separates professional shots from snapshots.
- Poles, trees and signs that appear to grow out of a head. Move a step left or right, or move your client.
- Bright spots and clutter in the background: trash cans, cars, a stranger's bright jacket, a bright patch of sky. Bright things pull the eye away from the face.
- Cables, wires and a horizon line that cuts through the neck. Lower or raise the phone a little.
- A tilted horizon. Use the grid lines to check that water, walls and buildings are straight.
- Distracting objects at the edges, like the corner of a table or a stray hand. If you can't move it, move yourself.
- Your own shadow or your finger. Look for these in the corners.
If the background is messy, you have three options: move your client to a cleaner spot, change your angle (shoot slightly lower or higher to hide the clutter), or get closer to your client, in the zoom sense from lesson 3.
Common mistakes and how to avoid them
- Always putting the subject in the center. Use the grid and try a third.
- Too much headroom, with the subject at the bottom of the picture. Raise the eyes toward the top third.
- Cropping at the ankles or wrists. Cut between joints.
- No space where they are looking. Add room on the side they face.
- Not scanning the background. Take the five-second scan every time.
- A crooked horizon. Match the grid lines to a straight edge in the scene.
Key takeaway
Put the eyes on the top third, give your client room to look into, and scan the edges before you press the button.
Want to save your progress? Sign up as a photographer.